Easy Ukrainian Sauerkraut
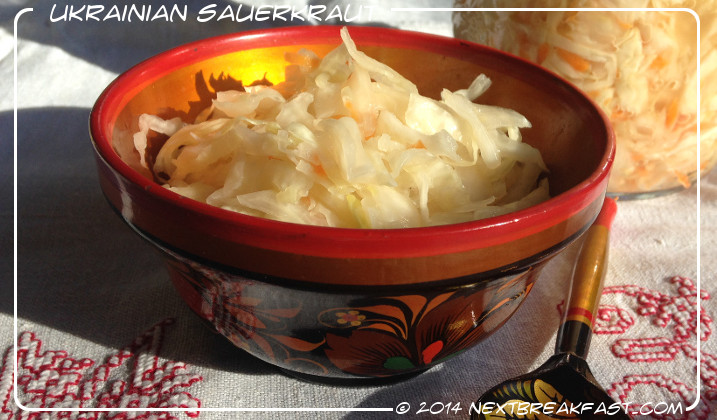 Sauerkraut is a German word meaning sour cabbage, in Russian it is called “Kvashenaya Kapusta” which translates simply as “fermented cabbage”. We almost never ate it as sour and mature as the Germans do, we would start devouring it after only a week of fermentation, with toasted sunflower seed oil from the market, or just as is.
Ukrainian sauerkraut in our family has a very stable recipe: cabbage, carrot, salt and time. No seeds, no onions, no nothing else. I have experimented with plenty of variations, but my favourite remains this basic recipe. It is versatile, and you can always combine it with spices later.
To make sauerkraut you will need
1 cabbage of the early autumn variety (the huge ones you see in the shops about September-October time) – they are firm and juicy. I struggle to get enough liquid out of a different variety, but it is possible. My cabbage for this batch was just over 3 kg and I got about 2.5 litres of sauerkraut of it.
2 medium carrots (flexible, more or less)
sea salt or Himalayan salt
Method:
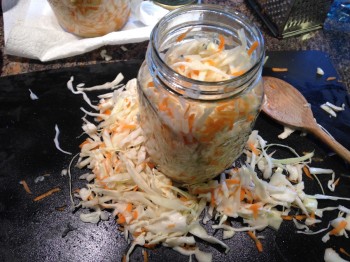
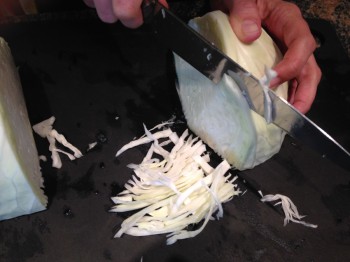 1. Cut your cabbage in quarters. Start chopping from the top in thin slivers. Adjust the angle as you come close to the core to get all the thin leaves chopped. We like big crunchy bits too, so I chop some coarsely, some finely and add some big leaf pieces in between. Beware of cabbage thieves!
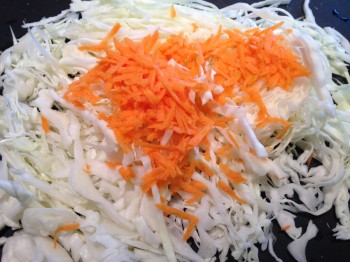 2. Once you have chopped a quarter, grate some carrot on top, sprinkle as much salt as you would on a salad of this size – maybe just under a teaspoon. Mix with your hands, massage it a little to get the juices out,
 but not too much, otherwise it will lose its crunch. Try for salt. It should be slightly more salty than your normal salad. If it is too salty – don’t worry, make your next quarter less salty, it will all get mixed in a jar anyway.
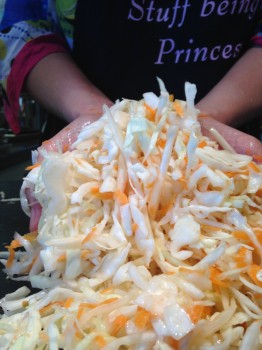
3. Continue chopping and adding carrot, massaging and salting.
4. Pack the mixture into jars. TIP: I find that if I place the jar in the middle of the cutting board, all the spills are easily collected and put back into the jar, otherwise it just goes everywhere.
5. Press down on the cabbage after every couple of inches, so its well packed. You want to see juices rise to the top.
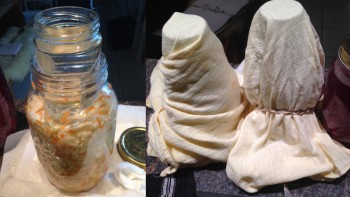
6. Take a clean small glass jar, fill it with water and put on top of your cabbage as a weight to keep all the cabbage under the juices, cover with a muslin cloth and leave at room temperature for at least a week. My grandmother used to use a full size granite cobble (that we picked up when a street was getting re-cobbled) as a weight in a 10 litre enamelled bucket, but I am working on a much more modest scale. I used to ferment in bigger vessels, but I find that fermenting directly in a jar saves a lot of hassle.
Visit your cabbage daily, press on the small jar and watch bubbles being released from inside the tightly packed jar of cabbage. Take a chopstick or a wooden skewer and pierce the cabbage to release the gas once a day or so.
Try the Sauerkraut after 4 days, and after 7 days, see what you think. It will continue to ferment and mature after you put it in the fridge.
Benefits:
Sauerkraut is rich in vitamins C, B and K. It has also plenty of good bacteria (lactobacilli) that we benefit from , especially at times when our immune system needs a boost or after taking antibiotics.
One of my favourite historical facts about Sauerkraut is that captain James Cook took 7, 860 pounds of Sauerkraut in 1768 aboard his ship the HM Bark Endeavor as a prevention for scurvy with encouraging results.
“Kimchi, sauerkraut’s Korean cousin, was historically used during winter to stave off vitamin deficiencies, while early records show workers building the Great Wall of China ate fermented cabbage regularly when fruit was not available. In fact, the earliest sauerkraut recipes found in Eastern Europe are thought to have come by way of the hordes of Genghis Khan.” read more on ModernFarmer



This is a lovely process you describe. I love the ethnic origin of your recipe, and your memories. Great photos and writing. Thanks for sharing!!
Looks so easy and wonderful and yet I still buy mine! It is on my every growing list of things to do!
I’ve been meaning to make my own kraut soon…thanks for the inspiration. I need to get cracking. 🙂
Kim recently posted…Fiddlebumps – A Review and Giveaway
Yum this looks great! I LOVE kraut!
Emily @ Recipes to Nourish recently posted…Concord Grape Sherbet
Love Sauerkraut 🙂 easy to prepare, yummy and healthy.
However, I noticed that the final result heavily depends on the cabbage type. Not all types of cabbage are suitable.
Masha, do you have any advice on how to choose the right type?
Lucy recently posted…10 Point Strategy for a Flu Free Winter
You’ve inspired me to finally give it a go, and it was MUCH easier than I thought it would be!!
It’s delicious!
I do have one question you might know the answer to: on my first try, I got 3 small cabbages, and one of them was bitter (that, I unfortunately noticed only after fermentation…). Did that ever happen to you? is it because the cabbage was old (although I did use it the same day I got it)?
Danna recently posted…Doing it Grandmaâs Way
I am so happy you have tried it! It may be hard work if you are doing 2 huge cabbages, but it is still like meditation 🙂 Small cabbages are tricky. You would ideally want them as white and as firm as possible. I never had the bitterness problem, but I had a problem with small cabbages being too dry. I always taste (a lot, and Katherine does too) from the board while cutting and salting – this should help you to detect any dodgy cabbages!
Masha recently posted…Primal Blogging